Morse Engineering and Construction Industries


Recent Posts

Archive

Personalized Snow & Ice Removal

- Friday, January 20, 2023
Morse Engineering and Construction - Snow & Ice Removal

We all know that snow plow drivers are in short supply. Has your private snow plow service gone to work for the town?

You need personalized programs and service in salt spreading, snow plowing and complementary snow removal to ensure your individual snow and ice removal is a success.

The appropriate snow removal equipment and de-icing materials need to be used to minimize damage to your paving and landscape while maximizing ice melting results. For serious applications consider salt spreaders that are equipped with calcium tanks to “pre-wet” the salt in order to release heat and attract moisture. The pre-wetting process ultimately creates a brine for fast and effective melting of stubborn ice at air temperatures well below freezing.

For more information, contact Morse Engineering and Construction.


Can You Install A Septic System In The Winter?

- Friday, January 13, 2023
Morse Engineering and Construction - Can You Install A Septic System In The Winter?

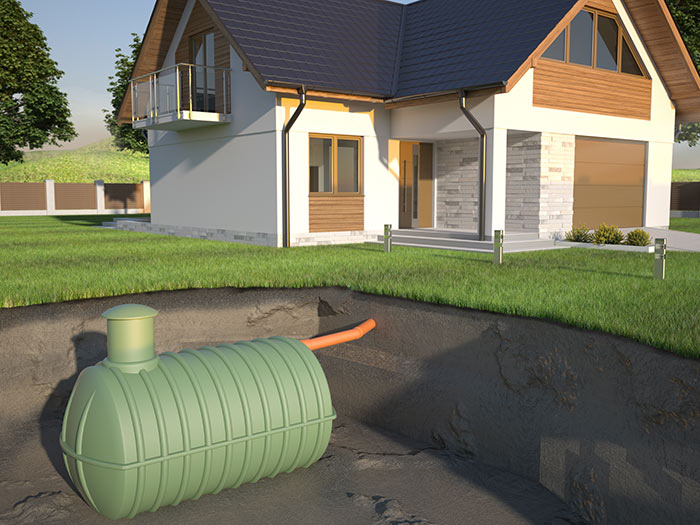
Installing a septic tank in winter requires careful planning and adherence to local regulations. Here are the 10 general steps to take when installing a septic tank in winter:

  1. Determine the appropriate location for the septic tank. This will typically be at least 10 feet away from the home and any other buildings, and away from bodies of water or slope.
  2. Obtain the necessary permits. You will need to obtain a permit from the local health department before installing a septic tank.
  3. Choose the size of the septic tank. The size of the septic tank will depend on the size of your home and the number of people living in it. A larger tank may be necessary if you have a large family or expect a lot of water usage.
  4. Excavate the site. Once you have chosen the location for the septic tank, you will need to excavate the site to make room for the tank. This will require the use of heavy machinery, such as a backhoe.
  5. Install the tank. The septic tank should be placed in the excavation and leveled to ensure proper operation. The tank should also be anchored to prevent movement.
  6. Connect the tank to the home. The septic tank will need to be connected to the home via a series of pipes. These pipes will transport the waste water from the home to the septic tank.
  7. Install the drain field. The drain field, also known as the leach field, is a series of trenches or beds where the effluent can be filtered and absorbed into the soil. The drain field should be located at least 50 feet from any water source.
  8. Backfill and grade the site. Once the septic tank and drain field are installed, you will need to backfill the excavation and grade the site to ensure proper drainage.
  9. Activate the septic bacteria. Septic tanks rely on bacteria to break down and digest the wastewater and solid matter. You can help to jumpstart the bacterial process by adding a bacterial activator to the tank. This can help to speed up the digestion process and ensure that the septic system is functioning properly.
  10. Test the system. After the septic tank has been installed, it is important to test the system to ensure that it is functioning properly. This may involve testing the water levels in the tank and observing the drain field to ensure that the wastewater is being properly absorbed into the soil.

For more information, contact Morse Engineering and Construction.

Source: ecotate.com


New Septic System Installation: What's Involved

- Friday, January 06, 2023
Morse Engineering and Construction - New Septic System Installation

When building a home, one of the many aspects you have to consider is the sewer disposal system. Here’s what you should expect during the entire installation process.

3 Steps for Installing a New Septic System

1. Apply for Site Evaluation

Not every property is suitable for a septic system. Therefore, the site needs to be evaluated first. The soil is tested for its porosity, texture, and other factors that affect its ability to hold and drain water. Licensed inspectors from the local health department will run a percolation test to determine what system will work best under the existing conditions. They do this to prevent any potential contamination of the aquifer.

Apart from the soil, they will also look at the topography, landscape position, and groundwater conditions to identify which area is ideal for the drainfield. They will recommend the type and size of the septic system that works best on your property after seeing the site in person and comparing it against the submitted proposed structural layout.

2. Obtain Permit for Installation

Once you have received the results after the inspection, you must provide this to a certified septic tank and system installer. They should draft a detailed plan of the system to be submitted to the local health department for approval first before obtaining the building permit.

Keep in mind that the permit is only valid for one year, so refrain from delaying the installation. However, that doesn’t mean you have to rush the process—take the time to research the licensed local contractors before hiring one. Get at least three estimates from different companies to have a better gauge of the costs. Don’t forget to run a comprehensive check on their credentials as well.

3. Inspection by the Health Department After the Installation

After the septic tank and pipes have been laid down in their places, you have to notify the local health department for a final site inspection. This last step ensures that the septic system follows the requirements indicated on the permit and preliminary site inspection. If the inspector sees that everything is up to par, they will green-light its use.

For more information, contact Morse Engineering and Construction.

Source: connect2local